Figure 1. A happy bird to ease any install-induced frustration
Applications can live in CouchDB—nice. You just attach a bunch of HTML and JavaScript files to a design document and you are good to go. Spice that up with view-powered queries and show functions that render any media type from your JSON documents, and you have all it takes to write self-contained CouchDB applications.
If you want to install and hack on your own version of Sofa while you read the following chapters, we’ll be using CouchApp to upload the source code as we explore it.
We’re particularly excited by the prospect of deploying applications to CouchDB because, depending on a least-common denominator environment, that encourages users to control not just the data but also the source code, which will let more people build personal web apps. And when the web app you’ve hacked together in your spare time hits the big time, the ability of CouchDB to scale to larger infrastructure sure doesn’t hurt.
In a CouchDB design document, there are a mix of development languages (HTML, JS, CSS) that go into different places like attachments and design document attributes. Ideally, you want your development environment to help you as much as possible. More important, you’re already used to proper syntax highlighting, validation, integrated documentation, macros, helpers, and whatnot. Editing HTML and JavaScript code as the string attributes of a JSON object is not exactly modern computing.
Lucky for you, we’ve been working on a solution. Enter CouchApp. CouchApp lets you develop CouchDB applications in a convenient directory hierarchy—views and shows are separate, neatly organized .js files; your static assets (CSS, images) have their place; and with the simplicity of a couchapp push, you save your app to a design document in CouchDB. Make a change? couchapp push and off you go.
This chapter guides you through the installation and moving parts of CouchApp. You will learn what other neat helpers it has in store to make your life easier. Once we have CouchApp, we’ll use it to install and deploy Sofa to a CouchDB database.
The CouchApp Python script and JavaScript framework we’ll be using grew out of the work designing this example application. It’s now in use for a variety of applications, and has a mailing list, wiki, and a community of hackers. Just search the Internet for “couchapp” to find the latest information. Many thanks to Benoît Chesneau for building and maintaining the library (and contributing to CouchDB’s Erlang codebase and many of the Python libraries).
CouchApp is easiest to install using the Python easy_install script, which is part of the setuptools package. If you are on a Mac, easy_install should already be available. If easy_install is not installed and you are on a Debian variant, such as Ubuntu, you can use the following command to install it:
sudo apt-get install python-setuptools
Once you have easy_install, installing CouchApp should be as easy as:
sudo easy_install -U couchapp
Hopefully, this works and you are ready to start using CouchApp. If not, read on….
The most common problem people have installing CouchApp is with old versions of dependencies, especially easy_install itself. If you got an installation error, the best next step is to attempt to upgrade setuptools and then upgrade CouchApp by running the following commands:
sudo easy_install -U setuptools
sudo easy_install -U couchapp
If you have other problems installing CouchApp, have a look at setuptools for Python’s easy install troubleshooting, or visit the CouchApp mailing list.
Installing CouchApp via easy_install should, as they say, be easy. Assuming all goes according to plan, it takes care of any dependencies and puts the couchapp utility into your system’s PATH so you can immediately begin by running the help command:
couchapp --help
We’ll be using the clone and push commands. clone pulls an application from a running instance in the cloud, saving it as a directory structure on your filesystem. push deploys a standalone CouchDB application from your filesystem to any CouchDB over which you have administrative control.
There are three ways to get the Sofa source code. They are all equally valid; it’s just a matter of personal preference and how you plan to use the code once you have it. The easiest way is to use CouchApp to clone it from a running instance. If you didn’t install CouchApp in the previous section, you can read the source code (but not install and run it) by downloading and extracting the ZIP or TAR file. If you are interested in hacking on Sofa and would like to join the development community, the best way to get the source code is from the official Git repository. We’ll cover these three methods in turn. First, enjoy Figure 1, “A happy bird to ease any install-induced frustration”.
Figure 1. A happy bird to ease any install-induced frustration
One of the easiest ways to get the Sofa source code is by cloning directly from J. Chris’s blog using CouchApp’s clone command to download Sofa’s design document to a collection of files on your local hard drive. The clone command operates on a design document URL, which can be hosted in any CouchDB database accessible via HTTP. To clone Sofa from the version running on J. Chris’s blog, run the following command:
couchapp clone http://jchrisa.net/drl/_design/sofa
You should see this output:
[INFO] Cloning sofa to ./sofa
Now that you’ve got Sofa on your local filesystem, you can skip to the section called “Deploying Sofa” to make a small local change and push it to your own CouchDB.
If you merely want to peruse the source code while reading along with this book, it is available as standard ZIP or TAR downloads. To get the ZIP version, access the following URL from your browser, which will redirect to the latest ZIP file of Sofa: http://github.com/couchapp/couchapp/zipball/master. If you prefer, a TAR file is available as well: http://github.com/couchapp/couchapp/tarball/master.
The most up-to-date version of Sofa will always be available at its public code repository. If you are interested in staying up-to-date with development efforts and contributing patches back to the source, the best way to do it is via Git and GitHub.
Git is a form of distributed version control that allows groups of developers to track and share changes to software. If you are familiar with Git, you’ll have no trouble using it to work on Sofa. If you’ve never used Git before, it has a bit of a learning curve, so depending on your tolerance for new software, you might want to save learning Git for another day—or you might want to dive in head first! For more information about Git and how to install it, see the official Git home page. For other hints and help using Git, see the GitHub guides.
To get Sofa (including all development history) using Git, run the following command:
git clone git://github.com/jchris/sofa.git
Now that you’ve got the source, let’s take a quick tour.
Once you’ve succeeded with any of these methods, you’ll have a copy of Sofa on your local disk. The following text is generated by running the tree command on the Sofa directory to reveal the full set of files it contains. Sections of the text are annotated to make it clear how various files and directories correspond to the Sofa design document.
sofa/
|-- README.md
|-- THANKS.txt
The source tree contains some files that aren’t necessary for the application—the README and THANKS files are among those.
|-- _attachments
|   |-- LICENSE.txt
|   |-- account.html
|   |-- blog.js
|   |-- jquery.scrollTo.js
|   |-- md5.js
|   |-- screen.css
|   |-- showdown-licenese.txt
|   |-- showdown.js
|   |-- tests.js
|   `-- textile.js
The _attachments directory contains files that are saved to the Sofa design document as binary attachments. CouchDB serves attachments directly (instead of including them in a JSON wrapper), so this is where we store JavaScript, CSS, and HTML files that the browser will access directly.
Making your first edit to the Sofa source code will show you how easy it is to modify the application.
|-- blog.json
The blog.json file contains JSON used to configure individual installations of Sofa. Currently, it sets one value, the title of the blog. You should open this file now and personalize the title field—you probably don’t want to name your blog “Daytime Running Lights,” so now’s your chance to come up with something more fun!
You could add other blog configurations to this file—maybe things like how many posts to show per page and a URL for an About page for the author. Working changes like these into the application will be easy once you’ve walked through later chapters.
|-- couchapp.json
We’ll see later that couchapp outputs a link to Sofa’s home page when couchapp push is run. The way this works is pretty simple: CouchApp looks for a JSON field on the design document at the address design_doc.couchapp.index. If it finds it, it appends the value to the location of the design document itself to build the URL. If there is no CouchApp index specified, but the design document has an attachment called index.html, then it is considered the index page. In Sofa’s case, we use the index value to point to a list of the most recent posts.
|-- helpers
|   `-- md5.js
The helpers directory here is just an arbitrary choice—CouchApp will push any files and folders to the design document. In this case, the source code to md5.js is JSON-encoded and stored on the design_document.helpers.md5 element.
|-- lists
|   `-- index.js
The lists directory contains a JavaScript function that will be executed by CouchDB to render view rows as Sofa’s HTML and Atom indexes. You could add new list functions by creating new files within this directory. Lists are covered in depth in Chapter 14, Viewing Lists of Blog Posts.
|-- shows
|   |-- edit.js
|   `-- post.js
The shows directory holds the functions CouchDB uses to generate HTML views of blog posts. There are two views: one for reading posts and the other for editing. We’ll look at these functions in the next few chapters.
|-- templates
|   |-- edit.html
|   |-- index
|   |   |-- head.html
|   |   |-- row.html
|   |   `-- tail.html
|   `-- post.html
The templates directory is like the helpers directory and unlike the lists, shows, or views directories in that the code stored is not directly executed on CouchDB’s server side. Instead, the templates are included into the body of the list and show functions using macros run by CouchApp when pushing code to the server. These CouchApp macros are covered in Chapter 12, Storing Documents. The key point is that the templates name could be anything. It is not a special member of the design document; just a convenient place to store and edit our template files.
|-- validate_doc_update.js
This file corresponds to the JavaScript validation function used by Sofa to ensure that only the blog owner can create new posts, as well as to ensure that the comments are well formed. Sofa’s validation function is covered in detail in Chapter 12, Storing Documents.
|-- vendor
|   `-- couchapp
|       |-- README.md
|       |-- _attachments
|       |   `-- jquery.couchapp.js
|       |-- couchapp.js
|       |-- date.js
|       |-- path.js
|       `-- template.js
The vendor directory holds code that is managed independently of the Sofa application itself. In Sofa’s case, the only vendor package used is couchapp, which contains JavaScript code that knows how to do things like link between list and show URLs and render templates.
During couchapp push, files within a vendor/**/_attachments/* path are pushed as design document attachments. In this case, jquery.couchapp.js will be pushed to an attachment called couchapp/jquery.couchapp.js (so that multiple vendor packages can have the same attachment names without worry of collisions).
`-- views
    |-- comments
    |   |-- map.js
    |   `-- reduce.js
    |-- recent-posts
    |   `-- map.js
    `-- tags
        |-- map.js
        `-- reduce.js
The views directory holds MapReduce view definitions, with each view represented as a directory, holding files corresponding to map and reduce functions.
The source code is safely on your hard drive, and you’ve even been able to make minor edits to the blog.json file. Now it’s time to deploy the blog to a local CouchDB. The push command is simple and should work the first time, but two other steps are involved in setting up an admin account on your CouchDB and for your CouchApp deployments. By the end of this chapter you’ll have your own running copy of Sofa.
Any time you make edits to the on-disk version of Sofa and want to see them in your browser, run the following command:
couchapp push . sofa
This deploys the Sofa source code into CouchDB. You should see output like this:
[INFO] Pushing CouchApp in /Users/jchris/sofa to design doc:
http://127.0.0.1:5984/sofa/_design/sofa
[INFO] Visit your CouchApp here:
http://127.0.0.1:5984/sofa/_design/sofa/_list/index/recent-posts?descending=
true&limit=5
If you get an error, make sure your target CouchDB instance is running by making a simple HTTP request to it:
curl http://127.0.0.1:5984
The response should look like:
{"couchdb":"Welcome","version":"0.10.1"}
If CouchDB is not running yet, go back to Chapter 3, Getting Started and follow the “Hello World” instructions there.
If CouchDB was running, then couchapp push should have directed you to visit the application’s index URL. Visiting the URL should show you something like Figure 2, “Empty index page”.
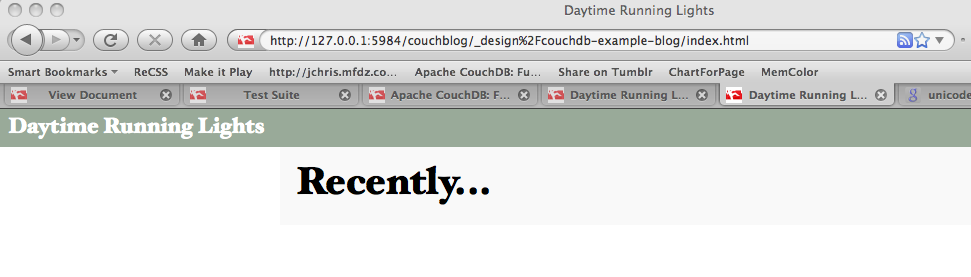
Figure 2. Empty index page
We’re not done yet—there are a couple of steps remaining before you’ve got a fully functional Sofa instance.
Sofa is a single-user application. You, the author, are the administrator and the only one who can add and edit posts. To make sure no one else goes in and messes with your writing, you must create an administrator account in CouchDB. This is a straightforward task. Find your local.ini file and open it in your text editor. (By default, it’s stored at /usr/local/etc/couchdb/local.ini.) If you haven’t already, uncomment the [admins] section at the end of the file. Next, add a line right below the [admins] section with your preferred username and password:
[admins]
jchris = secretpass
Now that you’ve edited your local.ini configuration file, you need to restart CouchDB for changes to take effect. Depending on how you started CouchDB, there are different methods of restarting it. If you started in a console, then hitting Ctrl-C and rerunning the same command you used to start it is the simplest way.
If you don’t like your passwords lying around in plain-text files, don’t worry. When CouchDB starts up and reads this file, it takes your password and changes it to a secure hash, like this:
[admins]
jchris = -hashed-207b1b4f8434dc604206c2c0c2aa3aae61568d6c,96406178007181395cb72cb4e8f2e66e
CouchDB will now ask you for your credentials when you try to create databases or change documents—exactly the things you want to keep to yourself.
Now that we’ve set up admin credentials, we’ll need to supply them on the command line when running couchapp push. Let’s try it:
couchapp push . http://jchris:secretpass@localhost:5984/sofa
Make sure to replace jchris and secretpass with your actual values or you will get a “permission denied” error. If all works according to plan, everything will be set up in CouchDB and you should be able to start using your blog.
At this point, we are technically ready to move on, but you’ll be much happier if you make use of the .couchapprc file as documented in the next section.
If you don’t want to have to put the full URL (potentially including authentication parameters) of your database onto the command line each time you push, you can use the .couchapprc file to store deployment settings. The contents of this file are not pushed along with the rest of the app, so it can be a safe place to keep credentials for uploading your app to secure servers.
The .couchapprc file lives in the source directory of your application, so you should look to see if it is at /path/to/the/directory/of/sofa/.couchapprc (or create it there if it is missing). Dot files (files with names that start with a period) are left out of most directory listings. Use whatever tricks your OS has to “show hidden files.” The simplest one in a standard command shell is to list the directory using ls -a, which will show all hidden files as well as normal files.
    {
      "env": {
        "default": {
          "db": "http://jchris:secretpass@localhost:5984/sofa"
        },
        "staging": {
          "db": "http://jchris:secretpass@jchrisa.net:5984/sofa-staging"
        },
        "drl": {
          "db": "http://jchris:secretpass@jchrisa.net/drl"
        }
      }
    }
With this file set up, you can push your CouchApp with the command couchapp push, which will push the application to the “default” database. CouchApp also supports alternate environments. To push your application to a development database, you could use couchapp push dev. In our experience, taking the time to set up a good .couchapprc is always worth it. Another benefit is that it keeps your passwords off the screen when you are working.